Summary
A very long (3600 words) ramble through my experience of getting an EDASM development environment set up on an Apple IIc. Takeaway: the problems are no worse (perhaps easier) than modern development tools, and you need off-board printing (to a printer or a larger screen) of your assembly listings.
Introduction
Many (almost 40!) years ago, someone brought to my junior high school Apple II+ computer lab a diskette labeled “HRCG.” Nobody was quite sure what it was, though we eventually figured out that stood for “High Resolution Character Generator,” but the diskette had some good looking (for that computer and time) games and demos on it.
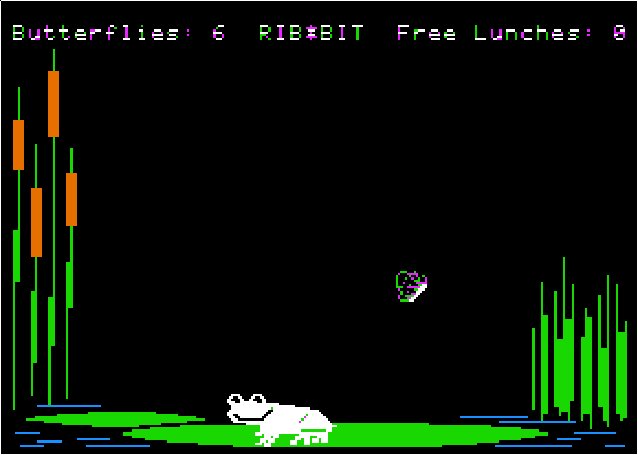
This disk was was actually the DOS Tool Kit 1.0. Follow that link and you can “play” the disk image in the emulator; once a command prompt appears, RUN RIBBIT will produce the screen you see above. RUN MAXWELL will also produce a fun little demo, though that one looks a bit different from what it did on a real CRT monitor. Sadly, the emulation seems to have a problem with what I’ll be demonstrating in this post, but it ought to work in a standalone Apple II+ emulator if you want to follow along.
The disk was copied and traded around for a bit, as was the wont of impecunious junior high school students, but was soon enough forgotten as new and better games came around.
But I was curious as to what the other stuff on this diskette was, and soon enough I found out that one of the things on it was called EDASM, and was used for some mysterious thing called “assembly language” programming. (The instructor in our lab never got beyond Applesoft BASIC, so I had to figure all this stuff out myself.)
I don’t know if I ever got hold of a copy of the Apple 6502 Assembler/Editor manual, but I must have found some sort of book somewhere because I did start playing with it a bit, and eventually even learned to poke at the system monitor and read some of the mysterious ROM listing in the Apple II Reference Manual.
Recently I wanted to run a little test program on my Apple IIc that required assembly language. I have yet to work out a really convenient and quick way to transfer builds from my Unix cross-assembly system to my IIc, and rather than do that now I thought this would be a good opportunity to go back to EDASM and remind myself what it was really like.
Finding and Loading the Software
Finding the software itself wasn’t too bad; as mentioned above there are several “DOS Tool Kit” images on archive.org, though I’m not sure if any of them are the original distribution diskette. Most of them seem to have extra files of some sort; I just picked one more or less at random.
The next step was to get a copy on to my Apple IIc, which was no problem using ADTPro, or wouldn’t have been if it hadn’t mysteriously stopped working since the last time I used it. Lowering the serial speed from 115,200 (yes, Apples really do transfer just fine at that rate!) to 19,200 and perusing the server-side log files (for both ADTPro and the kernel logs for my USB serial adapter) didn’t help, so it was time to pull out heavy weaponry: the oscilloscope.
I pulled the cover off the DIN-5 connector at the Apple end of the cable, put a probe on its TX line, and that all seemed to look good, though it was around this time I started to think that perhaps the decoding on my Rigol DS1054Z isn’t so great. But the RX line was looking very dodgy; even quiescent it was basically noise a couple of volts in amplitude rather than a nice 12 V RS-232 signal. Obviously the problem was somewhere further down towards the PC, perhaps with my cheap PL2303 USB serial cable (yes, next time I buy FTDI). The easiest spot to get access next was at the DE-9 end of the Apple serial cable, so I took the shell off that and immediately it started working. Clearly taking apart just one end and threatening it with an oscilloscope was not enough to scare that cable into submission. (I must admit, it was also a little worrying that the Apple RX line was connected to the pin with only two strands of the wire, so I resoldered that before putting it back together.)
Once the cable was working ADTPro wrote the image to a 5.25" floppy like a, well, pro. After running a couple of the HRCG demo programs for nostalgia’s sake I booted the DOS 3.3 System Master and ran COPYA to make a second copy of the diskette for use as a work disk. This turned out to be perhaps an overly “nostalgic” experience as I confirmed that a full-disk copy on an Apple II needs about ten disk swaps. (Now that I think about it, it would have been much faster just to have ADTPro write a second copy.) No wonder we didn’t back up so often back in the day!
Given a work disk with only three sectors free and full of stuff I didn’t need, the next step was to remove about 45 files I didn’t need. These files were marked read-only (“locked,” in DOS 3.3 terminology) so I needed to type, e.g., UNLOCK MAXWELL followed by DELETE MAXWELL to remove each file. (DOS 3.3 does not support wildcards.) As I found myself wishing for Bourne shell, I suddenly realized that I did have something similar!
10 D$ = CHR$(4) : REM CTRL-D
20 EXT$ = ".SET"
100  READ F$
120 FF$ = F$ + EXT$
130  PRINT FF$
140  PRINT D$;"UNLOCK ";FF$
150  PRINT D$;"DELETE ";FF$
160  GOTO 100
200  DATA MAX,FROGS1,FROGS2,SKY1,SKY2,SKY3,M
    USH,ASCII,BLIPPO BLACK,BYTE,COLOSSAL,COU
    NT,CYRILLIC,ESPERANTO,FLOW,GOTHIC,GRAPHI
    C,GREEK,KATAKANA,MIRROR,OUTLINE,PINOCCHI
    O,PUDGY,ROMAN,SHADOW,SLANT,STOP,UPSIDE D
    OWN
On the Apple, all output to the screen goes through a DOS routine that scans it for lines starting with Ctrl-D and executes those lines as DOS commands, just as if they were typed at the keyboard. (This is an artifact of how the original ROMs did I/O, and related to why you set your print output routine to ROM in the disk controller card with PR#6 to boot a diskette.) So running the above program, followed by a few more tweaks and different names in the DATA statement, cleaned up my disk with little effort, allowing me to relax and appreciate how slow DOS file operations on floppies are.
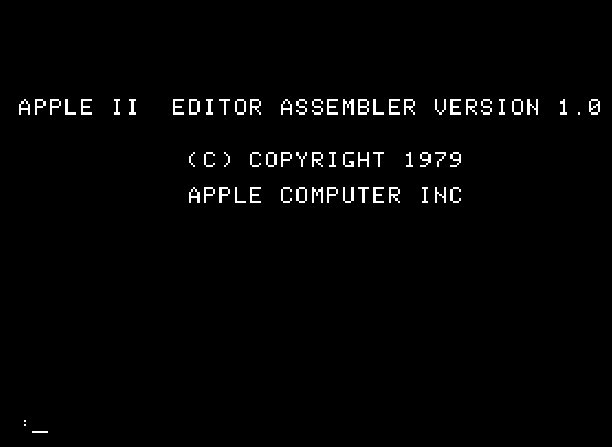
Having reduced my floppy contents to the ten or so files I really needed (EDASM, INTEDASM, EDASM.OBJ, ASSM, EDITOR, ASMIDSTAMP, RLOAD, and RBOOT) I made a backup copy of the disk (via an ADTPro upload: nostalgia goes only so far!) and was ready to type RUN EDASM and start work:
Manual
Of course, I first had to figure out how to use the system, which meant getting some documentation. Archive.org had the manual for the newer ProDOS version, ProDOS Assembler Tools Manual from 1983, but of course this is retrocomputing and I don’t want to be jumping off and switching to modern tools and documentation at the slightest inconvenience.
A post on applefritter pointed me at the Applesoft Tool Kit manual (or at least part of it), but while that was on the DOS Tool Kit disk image I’d downloaded, it Was Not The Documentation I Was Looking For. But (re-)learning about apple.asimov.net was the key, and looking under the 6502assembly/ documentation directory instead of the basic/ directory let me find the Apple 6502 Assembler/Editor manual, which I then uploaded to archive.org for searchability (archive.org OCRs uploaded documentation) easier reference (they also provide an on-line reader) and faster downloading.
First Steps
The first thing to do, of course, is start taking notes. Here I regret to say that, to my eternal shame, I did not do this with a pen and paper but instead used a markdown file committed to my Git repo for notes. (And I’m not writing this post in AppleWriter, either!) The only excuse I can provide is that I live in a tiny Japanese apartment and have no room for massive stacks of paper documentation. (Don’t ask how I have room for all these old computers.) I did, however, make some concession to contemporary practice by hauling out my paper copy of the Apple II Reference Manual. Oddly enough, in some ways that turns out to be more convenient than turning to another monitor to page through a PDF scan.

The next step is to learn enough of the editor commands that I can type in and edit a simple program. Typing in a ? prints a couple of screenfulls of help text (with a pause in the middle, continuing when you press a key) that gives the general idea (what appears in lower case below is actually in inverse text on the Apple II, because though my IIc supports lower-case, the original Apple II did not):
:?

ASM SOURCE FILE,<OBJECT FILE>,s<#>,d<#>
APPEND <LINE#>  SOURCE FILE
Add <LINE#>
CATalog
COpy LINE# - <LINE#> TO LINE#
Change <BEGIN# <-END#>> .OLDSTR.NEWSTR.
DRive #
Delete <BEGIN# <-END#>>
END
Edit <BEGIN# <-END#>>  .STRING.
FILE
Find <BEGIN# <-END#>>  .STRING.
HImem= #
Insert LINE#
LENgth
LOmem= #
LOaD SOURCE FILE
List <BEGIN# <-END#>>
MON
NEW
PR# # ,<DEVCTL>
Print <BEGIN# <-END#>>
Replace <BEGIN# <-END#>>
SLot #
SaVE  <BEGIN# <-END#>>  <SOURCE FILE>
TRuncOFf
TRuncON
TLOAD <BEGIN# <-END#>>
TSAVE <BEGIN# <-END#>>
Tabs <BEGIN# <-END#>>  .STRING.
Where LINE#
I won’t go into the details of each command here; you can have a look at my quick reference (which is likely still incomplete) or the full description of the editor in the manual, which I read through bit by bit as I went along.
The editor is actually somewhat similar to Unix ed, with List (with line numbers), Print (without line numbers), Insert, Append, and Change (like ed’s s) commands. One welcome addition, though, is a complex Edit command (taking up four pages of the manual) that allows a sort of visual editing for a single line. (It even has a vi-like “find char” command; type Ctrl-F followed by the character you wish to find and it will move the cursor forward in the line to that character.)
A major difference from ed is that there are many more commands (particularly for handling various disk operations that ed doesn’t do) and thus the commands are longer. However, they may be abbreviated by typing only the non-inverted (lower-case, above) characters.
One of the first ones I had to try was that tempting MON command, which does indeed drop you into the ROM’s machine-language monitor. The manual says on page 23 that “Normally this command is not used, except when you want to [do] some unusual things,” and gives dire warnings about how you can mess up your session by using it, which seems a bit odd for a package aimed at assembly language programmers. I would have ignored this had I seen it, but of course I didn’t even look up the command before trying it, leaving me wondering how to get back to the editor. We have powerful tools available, however, and indeed rebooting the machine did the trick. I later learned that Ctrl-Y Enter will go back to the editor, as will the standard 3D0G DOS vector that I had entirely forgotten about.
Writing a Program
A quick poke into the manual confirmed that one or more space characters are considered a “tab” between the label, mnemonic, operand and comment fields, and so I entered my first short program by typing A, which presented me with line numbers at which I typed my code. I couldn’t figure out how to end input mode, so after trying just a ., I tried Ctrl-D alone on a line and got lucky! (You can also use Ctrl-Q.)
(Actually, my whole process to get what you’re seeing here was much more roundabout, but I’ve condensed this to give you the idea without a huge amount of annoying detail.)
Listing it did not produce nicely formatted output, however:
:L

     1 * MY FIRST EDASM
     2 COUT EQU $FDED ;CHAR OUTPUT ROUTINE
     3  LDA #'H
     4  JSR COUT ;A VERY SHORT "HELLO"
     5  RTS
I thought I’d seen something about the editor automatically lining up the “tabbed” fields at specific columns. It turns out that it does, but I’d invoked the TAB command to see what it does. I thought, “nothing,” but without any arguments it had cleared the default tab stops. My big hammer of a restart fixed that, but I’ve since determined that T14,19,29 (which actually sets the tabstops to columns 16, 21 and 31!) will set tabstops back to the startup settings. Listing again:
     1 *        MY    FIRST     EDASM
     2 COUT     EQU   $FDED     ;CHAR OUT
       PUT ROUTINE
     3          LDA   #'H
     4          JSR   COUT      ;A VERY S
       HORT "HELLO"
     5          RTS
Wow, that’s a bit annoying. I now also understand why they have the TRON command to truncate lines at the start of the comment field, so long as the comment starts with space-semicolon:
     1 *        MY    FIRST     EDASM
     2 COUT     EQU   $FDED
     3          LDA   #'H
     4          JSR   COUT
     5          RTS
But you’d think that they’d get the editor to understand lines with a comment starting at the beginning of the line.
Assembly
Anyway, SAVE FIRST PROGRAM followed by ASM FIRST PROGRAM, after much chugging away on the disk drive, assembles without errors and does produce a reasonable listing on the screen, albeit truncated at the right. (I still don’t know how to view that right-hand portion; the manual, on page 27, says just that the “rightmost 40 [columns] will be available for viewing via keyboard commands.”)
    SOURCE FILE: FIRST PROGRAM
    0000:            1 * MY FIRST EDASM
    FDED:            2 COUT    EQU  $FDED
    0000:A9 D8       3         LDA  #'H
    0002:20 ED FD    4         JSR COUT
    0005:60          5         RTS

    *** SUCCESSFUL ASSEMBLY: NO ERRORS

     FDED COUT           FDED COUT
And while I can pause and “single-step” the assembly listing with the space bar during assembly, it’s clear that in retrocomputingland a printer is going to be essential for working any kind of major program. Much as I’d like to have an Epson MX-80 buzzing away, they don’t come so cheap these days, ribbons and tractor feed paper are hard to get in Japan (though, surprisingly, not in the U.S.) and I don’t have the space. But I have a solution: more on this later.
Loading the Assembled Program
In the meantime, I’d like to run my program, but certainly loading it over the zero page is not a good idea. So where?
As it turns out, the manual has an entire appendix on the memory usage of the assembler and editor. (EDASM.OBJ is actually just a control program that loads EDITOR to let you do your editing, and the loads ASSM over top of the editor when you use the ASM command, reloading EDITOR again over that when done.) But there’s not much in the way of free space here. The manual claims that $3D0-$3FF is unused by the editor, but that’s actually the standard location of the Apple DOS vectors, so trashing those seems like a bad idea (especially since they’re used by the assembler).
Rather than worry about things like this, I decided to investigate the LOMEM= and HIMEM= commands provided by EDASM; a HIMEM setting persists through the whole session and, if set appropriately, should keep both the editor and the assembler from stomping on my code (and my code from stomping on their data).
But in the classic Apple tradition, though they give you the memory map in hexadecimal, the program wants and displays decimal numbers, as seen when I confirm my current memory situation:
:FILE

 FIRST PROGRAM,D1,S6
  112 BYTES USED
30096 BYTES REMAINING
Well, 30096 + 112 = 30208 = $7600, that plus the default LOMEM of $2000 is $9600, which is indeed the end of the memory used by the system according to the memory map. (Actually, the last address is $95FF. DOS starts at $9600 on a 48 KB machine.) So I can just bring HIMEM down to $9000 and the area $9000-$9600 should be free for me to use:
:HIMEM=$9000
PARAMETER(S) OMITTED ERROR
Oh, right. Sigh.
:HIMEM=36864

:LEN
  112 BYTES USED
28560 BYTES REMAINING
28560+112+$2000 is indeed $9000, so we’re set. I add an ORG $9000 line to the beginning of my program, assemble, and we’re ready to try it out.
Running the Program
In Apple DOS, the first word of a binary (type B) file specifies the start location and the second word the length, so we need not specify these (with ,A$9000,L6 parameters appended to the BLOAD command). Once it’s loaded, we can enter the monitor, confirm that it looks ok, and run it:
:.BLOAD FIRST PROGRAM.OBJ0

:MON

*9000.900F

9000- A9 C8 20 ED FD 60 8E A5
9008- 22 8D 73 83 60 2C 54 C0

*9000L
9000-   A9 C8       LDA   #$C8
9002-   20 ED FD    JSR   $FDED
9005-   60          RTS
…

*9000G
H
*
It works!
Unfortunately for us if we want to run this standalone, the BRUN command that an end-user would use does a JMP to the program, not a JSR as the monitor’s R command uses. To make BRUN work, I suppose I can change the RTS at the end to a JMP $3D0, which should re-enter DOS and then send us back to whatever interpreter we were using. After making the change, saving and assembling, we test from both the EDASM prompt (:) and Applesoft BASIC (]):
:.BRUN FIRST PROGRAM.OBJ0
H
:
:END

]BRUN FIRST PROGRAM.OBJ0H
]
Well, I guess I should have printed a CR first. :-)
Listings
I mentioned earlier that for larger programs, having a proper assembly listing is a must; it’s simply too hard to read large amounts of code in an editor that can display no more than 18 lines of 34 characters each (the line numbers from the List command take up the first six columns), especially when you need to type in new parameters to the List command for each page because you can’t pause the scrolling output when more than one screenful is displayed.
The system provides a PR#p,[DevCtlstrg] command, similar to BASIC’s PR#n command to redirect output. Unlike BASIC, this EDASM command doesn’t do the redirect immediately, but instead stores it as a parameter for the assembler which does the redirect when it generates the listing.
If I had a parallel port card in slot 1, just PR#1 would probably do. But I have an Apple IIc which has no parallel port; instead it’s got a serial card in “virtual” slot 1. Since I’m going to have to use serial anyway, though, I’m going to use the serial port in slot 2 because that’s the port I use for ADTPro.
The Apple IIc Technical Reference Manual documents what I need to know. According to page 173 the port at startup is set to 300/8/N/1, so on the Unix side I can
stty </dev/ttyUSB0 300 min 1 -parenb; cat /dev/ttyUSB0
(The min 1 setting is required to ensure that cat will not immediately exit if no characters are available to be read. This is the default setting on Linux, but ADTPro will change it to min 0.)
Then from BASIC on the Apple I enter a small program, type PR#2, then LIST. This produces rubbish on the output. But ah! the Apple II sets the high bit on its ASCII characters, so I need to add istrip to the stty parameters. Now I get readable output, but all on one line because the Apple is sending just CR at the end of every line. Adding icrnl to the tty settings fixes that:
stty </dev/ttyUSB0 300 -parenb istrip icrnl; cat /dev/ttyUSB0
PR#0 brings the display back to the Apple II screen, where I can start EDASM again, enter PR#2 and ASM FIRST PROGRAM, and see if I get a listing in my terminal window on the Unix box:
SOURCE FILE: FIRST PROGRAM
0000:            1 * MY FIRST EDASM
0000:            2 *
----- NEXT OBJECT FILE NAME IS FIRST PROGRAM.OBJ0
9000:            3         ORG  $9000
FDED:            4 COUT    EQU  $FDED     ;CHAR OUTPUT ROUTINE
9000:A9 C8       5         LDA  #'H
9002:20 ED FD    6         JSR  COUT      ;A VERY SHORT "HELLO"
9005:            7 * RTS
9005:4C D0 03    8         JMP  $3D0

 *** SUCCESSFUL ASSEMBLY: NO ERRORS

  FDED COUT           FDED COUT
Brilliant! Well, except for the speed. The Apple assembler is not the fastest in the world, but it’s a lot faster than 300 bps! That optional DevCtlStrg parameter to the PR# command must be what I need to change the speed.
The EDASM manual gives an example of using a control string for a parallel printer that includes a sequence of Ctrl-I followed by 80N to set the printer width. The Apple IIc techref says that port 2 accepts commands using Ctrl-A, and the command character followed by nnB sets the bit rate, with 15B setting it to 19200 bps (apparently the fastest speed the ROM supports). So we try:
- Apple II:
PR#2,<Ctrl-A>15B - Unix:
stty </dev/ttyUSB0 19200 min 1 -parenb istrip icrnl; cat /dev/ttyUSB0
And voila, a superfast assembly listing! (Faster even than listing to the Apple II screen; it seems that the assembler isn’t so slow after all.)
I can of course redirect the output of cat to a file if I want to keep a copy of the listing, but during the course of program development I’m happy enough just using the terminal window scrollback to scroll through it.
Conclusion
It was a lot more work than I had expected to get EDASM to the point where I can use it effectively, so as to be able to write more than trivial programs with it without too much pain. But it was certainly an interesting adventure. My two take-aways from this are:
- Swapping between the editor and assembler is annoyingly slow; I now see why co-resident assembly was such a good feature.
- 80-column printed listings are an important, perhaps primary tool when developing on systems with small (960 character) screens, perhaps especially if you don’t have a visual editor. (Though I don’t find using a line editor so bad, possibly because I used line editors a lot in the early '80s.)